iOS Revisited

Hot

Post Top Ad

7 Aug 2017

dispatch_after - GCD in swift? Swift 3, Swift 4.

8/07/2017 09:42:00 am 0

dispatch_after - GCD in swift? Swift 3, Swift 4.


Grand Central Dispatch :

It's used to distribute the computation across multiple cores dispatching any number of threads needed and it is optimized to work with devices with multi-core processors. Basically we use this in iOS for running background threads.

Swift 2 and Objective-C syntax : 

dispatch_after(dispatch_time_t when, dispatch_queue_t queue, dispatch_block_t block)

Method 1 :

let delayTime = dispatch_time(DISPATCH_TIME_NOW, Int64(1 * Double(NSEC_PER_SEC)))
dispatch_after(delayTime, dispatch_get_main_queue()) {
    print("Delayed by 4 Seconds")
}

Method 2 :

This is using closure, so we can easily reuse anywhere by simply as follow.

func delayAction(xSeconds:Double, closure:()->()) {
    dispatch_after(
        dispatch_time(
            DISPATCH_TIME_NOW,
            Int64(xSeconds * Double(NSEC_PER_SEC))
        ),
        dispatch_get_main_queue(), closure)
}
Simple call above method as following.

delayAction(0.5) {
    // do stuff here
    print("Delayed by 0.5 Seconds")
}
How to write dispatch_after GCD in Swift 3?
dispatch_after or asyncAfter in Swift 4.

Swift 3 and Swift 4 :

DispatchQueue.main.asyncAfter

Suppose if you want to execute a method after x amount of time then we can use 'dispatch_after' methods.

Let take a example. I want to execute a code after 4 seconds.

Method 1 :

let xSeconds = 4.0
DispatchQueue.main.asyncAfter(deadline: .now() + xSeconds) {
    print("Delayed by 4 Seconds")
}

Method 2 :

Using closure

func delayAction(_ xSeconds:Double, closure:@escaping ()->()) {
    let when = DispatchTime.now() + xSeconds
    DispatchQueue.main.asyncAfter(deadline: when, execute: closure)
}
Simple call above method as following.

delayAction(0.5) {
    // do stuff here
    print("Delayed by 0.5 Seconds")
}

For any queries please feel free to comment.

Read More

Parsing JSON Using Decodable in Swift 4 became super easy - Swift 4, iOS 11

8/07/2017 08:18:00 am 1
Parsing JSON in Swift 4 using Decodable Protocol. Parsing a complicate JSON is difficult because of redoing whole process again and again. In swift 4 it's not like swift 2,3, parsing became super easy and fast by just using single line of code. In this tutorial we are diving into Decodable protocol for JSON Parsing.

Parsing JSON Using Decodable in Swift 4 became super easy - Swift 4, iOS 11

Getting Started:

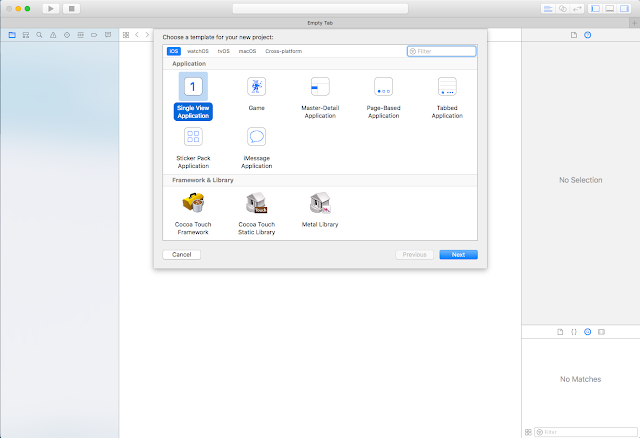
Create new project -> open Xcode -> File -> New -> Project -> Single View App, then tap next button. Type product name as 'JSONParseSwift4' then tap next and select the folder to save project.

In this article we will discuss about struct. Structs are very helpful for storing heterogeneous data unlike Array. For example in struct we can store Int, String etc

Creating a simple Struct. Write the following struct next to 'import UIKit'.


struct Tutorials {
    let id : Int
    let name : String
    let link : String
    let imageUrl : String
}
Cool, we created structure . Then how to use these Struct? Let write code for testing. Inside viewDidLoad() method write the following code.

let myTutorial = Tutorials(id: 1, name: "my tutorial", link: "some link", imageUrl: "some image")
print(myTutorial)
Build and Run, See the logs in console. Log should like following image.

Real time objects detected list

First thing we need sample JSON for parsing. So we need sample url for that. This is our sample url :

https://gist.githubusercontent.com/iosRevisited/bf28f444c262591b1807949ff40a2222/raw/695b2de9bc364762377d64595bf2b25a8de69786/sample.json 


Now how to get data from that url?

Here we go with simple code using URLSession with completion handler. Here is code for getting data from url. Delete all code inside viewDidLoad() method and replace with following code.


let urlString = "https://gist.githubusercontent.com/iosRevisited/bf28f444c262591b1807949ff40a2222/raw/695b2de9bc364762377d64595bf2b25a8de69786/sample.json"
    
    guard let url = URL(string: urlString) else {
    return
    }
    
    URLSession.shared.dataTask(with: url) { (data, response, err) in
    guard let data = data else { return }
    
    
    // Old School method for parsing Swift 2/3/Objective-C
    do {
    let json = try JSONSerialization.jsonObject(with: data, options: .mutableContainers)
    print(json)
    } catch let jsonErr {
    print("error in parsing",jsonErr)
    }
    }.resume()
Now Build and Run we will see data as following.

Parsing JSON Using Decodable Protocol
Now store the data in struct. So need to initialize with dictionary. Replace old Struct with new Struct.

struct Tutorials {
    let id : Int
    let name : String
    let link : String
    let imageUrl : String
    
    init(json:[String: Any]) {
        id = json["id"] as? Int ?? 0
        name = json["name"] as? String ?? ""
        link = json["link"] as? String ?? ""
        imageUrl = json["imageUrl"] as? String ?? ""
    }
}
Then replace 'print(json)' line with following code.

let tutorial = Tutorials(json: json)
print(tutorial.name)
Build and Run we will see the name in the console.

Output

Up to now what we did is old methods we used in Swift 2/3/Objective-C.

Now step into the new method introduced by apple in iOS 11 is Decodable Protocol. Remove init method in structure and provide Decodable Protocol to struct.
Replace structure with new struct with protocol.


struct Tutorial: Decodable {
    let id : Int
    let name : String
    let link : String
    let imageUrl : String
}
 Replace the code inside do { } block with following code.

let tutorial = try JSONDecoder().decode(Tutorial.self, from: data)
print(tutorial.name)
console output
Now Build and Run we will get the name as before but we never initialized the structure as before.

Important - we should match the data keys with the structure properties.


Array of Dictionaries :


Now let see this JSON:

[
 {
  "id": 1,
  "name": "Face Detection",
  "link": "http://iosrevisited.blogspot.com/2017/08/face-detection-using-vision-framework.html",
  "imageUrl": "https://support.apple.com/library/content/dam/edam/applecare/images/en_US/iOS/move-to-ios-icon.png"
 },
 {
  "id": 2,
  "name": "Real Time Object Detection",
  "link": "http://iosrevisited.blogspot.com/2017/08/real-time-camera-object-detection-with.html",
  "imageUrl": "https://support.apple.com/library/content/dam/edam/applecare/images/en_US/iOS/move-to-ios-icon.png"
 }
]
This is a bit complex than before. No worries, using swift 4 this became super easy. That JSON contains array of tutorials.

Change url to https://gist.githubusercontent.com/iosRevisited/7e6cd23e2a267a2503698411a834fe6c/raw/890f5842181369b83c820b4a6702b42776a9aabf/tutorials.json

Replace old url with new url. Then it looks like this.


let urlString = "https://gist.githubusercontent.com/iosRevisited/7e6cd23e2a267a2503698411a834fe6c/raw/890f5842181369b83c820b4a6702b42776a9aabf/tutorials.json"
Then inside do block change decode code to array like this [Tutorial]. Replace do block with following code.

let tutorials = try JSONDecoder().decode([Tutorial].self, from: data)
print("\(tutorials)")
Build and Run, Array of data appears like this:

Array of Dictionaries parsing using Decodable Protocol

Great, array of dictionaries also parsed using decodable protocol.


Complex Data Parsing: 


Now we will parse the following data from url - https://gist.githubusercontent.com/iosRevisited/65fff3a78a684909a7b64761799a02d3/raw/0850d72db8315ff25d2a24219d6592fd404deb35/Complex.json

{
 "name": "iOS Revisited",
 "description": "Blog about,Objective c language and Swift language programming questions, Tutorials, Bugs solving ....",
 "tutorials": [
  {
   "id": 1,
   "name": "Face Detection",
   "link": "http://iosrevisited.blogspot.com/2017/08/face-detection-using-vision-framework.html",
   "imageUrl": "https://support.apple.com/library/content/dam/edam/applecare/images/en_US/iOS/move-to-ios-icon.png"
  },
  {
   "id": 2,
   "name": "Real Time Object Detection",
   "link": "http://iosrevisited.blogspot.com/2017/08/real-time-camera-object-detection-with.html",
   "imageUrl": "https://support.apple.com/library/content/dam/edam/applecare/images/en_US/iOS/move-to-ios-icon.png"
  }
 ]
}
This structure is totally different from our struct model. We need to create one more model as following.

struct siteDescription: Decodable {
    let name: String
    let description: String
    let tutorials: [Tutorial]
}
Here we reused Tutorial Struct.

Now change urString. It looks like following.

let urlString = "https://gist.githubusercontent.com/iosRevisited/65fff3a78a684909a7b64761799a02d3/raw/0850d72db8315ff25d2a24219d6592fd404deb35/Complex.json"
Then replace code inside do block.

let siteData = try JSONDecoder().decode(SiteDescription.self, from: data)

print("\nname = \(siteData.name)")
print("\ndescription = \(siteData.description)")
print("\ntutorials = \(siteData.tutorials)")
Complex Data Parsing output

Build and Run , we will see following as output in console.

Cool, we parsed data easily in a efficient way using Decodable Protocol.


Read More

5 Aug 2017

Face Detection using Vision Framework - Swift, iOS11

8/05/2017 03:36:00 am 1

Face Detection using Vision Framework - Swift, iOS11


In iOS 11 Apple provide frameworks for specific areas. We will dive into Vision API. Using Vision framework tools we can process image or video to detect and recognize face, detect barcode, detect text, detect and track object, etc.

For detecting objects using Machine Learning Image Analysis follow this link - Real Time Camera Object Detection with Machine Learning - CoreML: Swift 4

In this article, we will bash out face detection. In vision API there are three roles.

Getting Started:

1. Request :

     Ex: VNDetectFaceRectanglesRequest to detect face in an image.

2. Request handler :

    Ex: VNImageRequestHandler, VNSequenceRequestHandler. VNImageRequestHandler for single image and VNSequenceRequestHandler is for a sequence of multiple images.

3. Observation :

     Provide informations like bounding box.


First create a new project -> open Xcode -> File -> New -> Project -> Single View App, then tap next button. Type product name as 'Face Recognization' then tap next and select the folder to save project.

Before start, download one sample image with faces and add to Assests.xcassets and name it as 'sample1'.

Now it's time to start writing a code. Open ViewController.swift add this line in viewDidLoad() method. 


 guard let image = UIImage(named: "sample1") else {
    return
}

Here image is an UIImage object used to detect faces. Then for displaying image add UIImageView as subview. Add the following code in viewDidLoad() method after else part.

 /........

let scaledHeight = view.frame.width / image.size.width * image.size.height
let imageView = UIImageView(image: image)
imageView.frame = CGRect(x: 0, y: 20, width: view.frame.width, height: scaledHeight)
view.addSubview(imageView)
Here scaledHeight is the imageView height calculated from ratio of device width and image size.

Now Build and Run , You will see image with aspect size based on device size.


We start with Vision API to detect face rectangles. For that we need to import vision add below 'import UIKit'.

 import Vision

As we mentioned earlier we are using three roles in this face detection. First we are going to create request using VNDetectFaceRectanglesRequest. Second step is to use request handler in this we are analyzing single image so we will use VNImageRequestHandler. This is an asynchronous so it's better to put VNImageRequestHandler in background thread. Third one Observations, we will use inside request completion handler. Let implement everything using code. Add the following code to the end  of viewDidLoad() method.

 /........

let request = VNDetectFaceRectanglesRequest { (req, error) in
    if let error = error  {
        print("Failed to detect faces",error)
        return
    }
    print(req.results)
}

guard let cgImage = image.cgImage else {
    return
}

DispatchQueue.global(qos: .background).async {
    let handler = VNImageRequestHandler(cgImage: cgImage, options: [:])
    
    do {
        try handler.perform([request])
    } catch let reqError {
        print("Error in req",reqError)
    }
}

Execution starts from VNDetectFaceRectanglesRequest after that it will not call completion handler. Then the flow goes to cgImage -> handler then we will perform request on handler. If the request succeded then it calls VNDetectFaceRectanglesRequest completion handler. It will analyze image and give results as array of VNFaceObservation.

Now Build and Run , Great You will see VNFaceObservation object in console.


Finally, we are getting rectangle. Parse VNFaceObservation to draw rectangles on detected faces in an image. For that copy the following lines of code and replace the line

'print(req.results)'.

guard let observations = req.results as? [VNFaceObservation]
    else { fatalError("unexpected result type") }


observations.forEach({ (observation) in
    DispatchQueue.main.async {
        print(observation.boundingBox)
        let x = self.view.frame.width * observation.boundingBox.origin.x
        let width = self.view.frame.width * observation.boundingBox.size.width
        let height = scaledHeight * observation.boundingBox.size.height
        let y = scaledHeight * (1 - observation.boundingBox.origin.y) - height
        let redSquare = UIView()
        redSquare.backgroundColor = UIColor.clear
        redSquare.layer.borderColor = UIColor.red.cgColor
        redSquare.layer.borderWidth = 2.0
        redSquare.frame = CGRect(x: x, y: y, width: width, height: height)
        self.view.addSubview(redSquare)
    }
})
Now Build and Run , Great detected faces in an image with red borders.


Download sample project with examples :

Read More

3 Aug 2017

11 Reasons Why Not to Use Storyboards and Interface Builder || Why I stopped using storyboards and Interface Builder

8/03/2017 04:54:00 am 1


Actually, up until a few months ago, I could not imagine creating a project without my beloved storyboard. I had looked a little into laying out constraints in code, and the syntax alone had scared the hell out of me. And yet, a couple of weeks after letting go of the storyboard, I couldn’t imagine myself ever using one again. 

So here are top 11 reasons why not using storyboards:

Reason 1 : Merge conflicts will drive you crazy. If you are working to team its better to avoid storyboards.

Reason 2 : Teaching beginner iOS programmers what is exactly going on is difficult with storyboards. Because we need to use drag and drop for outlets it's really pain.
 
Reason 3 : Difficult to record and explain things on storyboard because switching between stotyboards and View Controllers will take time.


Reason 4 : Screen size on laptop too small for storyboards. So we need a big external display.

Reason 5 : Productivity decrease when hands leave the keyboard.


Reason 6 : Refactoring all fonts in Storyboard components take too long.


Reason 7 : Compile time for complicated storyboards increases if you are building a big project.


Reason 8 : Cell Identifiers and Storyboard Id strings are unsafe it may leads to crash.


Reason 9 : IBOutlet & IBAction crashes when refactoring so we need to be carefull while refactoring.
 

Reason 10 : Difficulty in laying out views that are stacked. If there are so many subviews under , its difficult to give layouts.

Reason 11 : They complicate code reusability. In code, if you have 11 screens that look almost the same, it’s so easy to use a protocol to efficiently reuse your UI code between them. With a storyboard, good luck figuring out how to share outlets and actions!


For more updates follow us.


Read More

2 Aug 2017

Creating Youtube Home Feed using UITableView - Swift

8/02/2017 06:43:00 am 0


First create a new project -> open Xcode -> File -> New -> Project -> Single View Application, then tap next button. Type product name as Youtube HomeFeed then tap next and select the folder to save project.

https://www.spandidos-publications.com/article_images/or/31/2/OR-31-02-0701-g00.jpg 


Open Main.Storyboard, Drag TableView on to the ViewController and give Autolayouts as mentioned in the following picture. Make sure to uncheck the 'Constraints to margins'. 


Then drag TableViewCell on to the TableView. Change cell row height to 250 in size inspector. Add ImageView to cell and add constraints as below image.


Add Label to cell and give horizontal spacing to imageView , trailing to container margin, and top to imageView. Change label text alignment to left and text color to dark gray.


Add one more imageView to cell and give leading , trailing, top to container margins and bottom space to thumbnail ImageView.
Create new swift file by tapping File -> New -> File -> Swift file and name it as 'CustomTableViewCell'. Remove all lines of code and add the following code.
import Foundation
import UIKit

class CustomTableViewCell: UITableViewCell {
    
    @IBOutlet weak var contentImageView: UIImageView!
    
    @IBOutlet weak var channelThumbnailView: UIImageView!
    
    @IBOutlet weak var titleLabel: UILabel!

}
Open Main.Storyboard, select TableViewCell from hierarchy of views then change class to 'CustomTableViewCell'.


Then open connection inspector and give the links to TableViewCell subviews.


Open ViewController.Swift and this line before viewDidLoad() method and give link in storyboard. Tap tableview and give links to delegate and datasource.

@IBOutlet weak var tableView: UITableView!

Great upto now evrthing is ok. UI part preety much done. The main thing is getting data. For getting data we are going to create model. So again create new class by tapping File -> New -> File -> Swift file and name it as 'DataModel'. Add the follwing code.
class DataModel {
    
    var originalImageName : String?
    var thumbnailImageName : String?
    var title : String?
    
    
    init(originalImage: String, thumbnailImage: String, titleStr: String ) {
        originalImageName = originalImage
        thumbnailImageName = thumbnailImage
        title = titleStr
    }
}
Open ViewController.Swift and add dataArray property before viewDidLoad() method. 

var dataArray = [DataModel]()
Inside viewdidLoad() add these lines of code for getting model.

let dataModel1 = DataModel.init(originalImage: "Image-1", thumbnailImage: "Thumbnail Image -1", titleStr: "The Avengers")
let dataModel2 = DataModel.init(originalImage: "Image-2", thumbnailImage: "Thumbnail Image -2", titleStr: "Iron Man 3")
let dataModel3 = DataModel.init(originalImage: "Image-3", thumbnailImage: "Thumbnail Image -3", titleStr: "Thor")
let dataModel4 = DataModel.init(originalImage: "Image-4", thumbnailImage: "Thumbnail Image -4", titleStr: "The Incredible Hulk")
let dataModel5 = DataModel.init(originalImage: "Image-5", thumbnailImage: "Thumbnail Image -5", titleStr: "Spider Man 3")
        
dataArray = [dataModel1 ,dataModel2, dataModel3, dataModel4, dataModel5]

Now it's time to add Tableview Delegate and DataSource methods at the bottom of ViewController.Swift class.
extension ViewController : UITableViewDelegate,UITableViewDataSource {
    
    func numberOfSections(in tableView: UITableView) -> Int {
        return 1;
    }
    
    func tableView(_ tableView: UITableView, numberOfRowsInSection section: Int) -> Int {
        return dataArray.count;
    }
    
    func tableView(_ tableView: UITableView, cellForRowAt indexPath: IndexPath) -> UITableViewCell {
        var cell = CustomTableViewCell()
        return cell
    }
}
Replace cellForRowAt method with the follwing code

 func tableView(_ tableView: UITableView, cellForRowAt indexPath: IndexPath) -> UITableViewCell {
        let cell = tableView.dequeueReusableCell(withIdentifier: "CustomCell", for: indexPath) as! CustomTableViewCell
         let data = dataArray[indexPath.row]
        cell.contentImageView.image = UIImage(named: data.originalImageName!)
        cell.contentImageView.contentMode = .scaleAspectFill
        cell.contentImageView.clipsToBounds = true
        cell.channelThumbnailView.image = UIImage(named: data.thumbnailImageName!)
        cell.channelThumbnailView.contentMode = .scaleAspectFill
        cell.channelThumbnailView.clipsToBounds = true
        cell.channelThumbnailView.layer.cornerRadius = 25
        cell.titleLabel.text = data.title!
        return cell
    }
    
    func tableView(_ tableView: UITableView, heightForRowAt indexPath: IndexPath) -> CGFloat {
        return 300
    }


Build and run the app, you will see our super heros on our devices.

Download sample project with examples :

Read More

1 Aug 2017

Real Time Camera Object Detection with Machine Learning - CoreML: Swift 4

8/01/2017 04:05:00 am 1
This iOS machine learning tutorial will introduce you to Core ML and Vision, two brand-new frameworks introduced in iOS 11. For this we need Xcode 9 or greater, iOS 11 or greater.


Getting Started:

First create a new project -> open Xcode -> File -> New -> Project -> Single View Application, then tap next button. Type product name as 'Object Detector' then tap next and select the folder to save project.

For detecting objects we need to access device camera. Open ViewController.swift and import this framework, just below 'import UIKit'.

import AVKit
Now its time to write some code, open ViewController.swift and inside viewDidLoad() method write the following code to access camera.

 let captureSession = AVCaptureSession()
 captureSession.sessionPreset = .photo
 guard let captureDevice = AVCaptureDevice.default(for: .video) else {
      return
 }
 guard let input = try? AVCaptureDeviceInput(device: captureDevice) else {
      return
 }
 captureSession.addInput(input)
 captureSession.startRunning()
Build and run, Ouchh app crashes. No worries we need to add cameraUsageDescription in info.plist. Open info.plist add 'Privacy - Camera Usage Description' and description as 'We need to access camera for detecting objects'.

 
Now build and run. Great we see camera permission alert then tap ok.


We need to add camera to the view for that create 'PreviewLayer' as the following. Add these lines of code after 'captureSession.startRunning()' line in viewDidLoad().

let previewLayer = AVCaptureVideoPreviewLayer(session: captureSession)
view.layer.addSublayer(previewLayer)
previewLayer.frame = view.frame
Build and run , now you can see camera running on your device.

Great, now for detecting object we need image containg object for that we need to get frames from the camera. So use the following code at the end of viewDidLoad().

let dataOutput = AVCaptureVideoDataOutput()
dataOutput.setSampleBufferDelegate(self, queue: DispatchQueue(label: "videoQueue"))
captureSession.addOutput(dataOutput)
Add 'AVCaptureVideoDataOutputSampleBufferDelegate' delgate to the ViewController.swift class.

class ViewController: UIViewController, AVCaptureVideoDataOutputSampleBufferDelegate {
.....
}
 Add delegate method, it will call every time when camera is going to capture a frame.

func captureOutput(_ output: AVCaptureOutput, didOutput sampleBuffer: CMSampleBuffer, from connection: AVCaptureConnection) {

}
Now it's time to start using 'Machine Learning'. Open ViewController.swift and import this framework, just below 'import AVKit'.

import Vision
Go to this url 'https://developer.apple.com/machine-learning/' and download Resnet50 file. Drag that ML file to our project.

Add the following code inside delegate method.

guard let pixelBuffer : CVPixelBuffer = CMSampleBufferGetImageBuffer(sampleBuffer) else {
return }

guard let model = try? VNCoreMLModel(for: Resnet50().model) else {
return }
let request = VNCoreMLRequest(model: model) { (finishedReq, error) in
print("results ==",finishedReq.results)
}

try? VNImageRequestHandler(cvPixelBuffer: pixelBuffer, options: [:]).perform([request])
VNImageRequestHandler will perform all operation on image using VNCoreMLRequest.

VNCoreMLRequest accepts a VNCoreMLModel, here our model is Resnet50 model.

Build and Run, you will see the output in console with VNClassificationObservation objects.


Great we are getting some data. Lets parse the data using following code.
Replace 'print("results ==",finishedReq.results)' with the code below.


guard let results = finishedReq.results as? [VNClassificationObservation] else {
return
}

guard let firstObservation = results.first else {
return
}

print(firstObservation.identifier, firstObservation.confidence)
Build and Run the project we will see detected objects with confidence in console.


Download sample project with examples :

Read More

Post Top Ad