2017 - Swift 4 Tutorials W3Schools

Hot

Post Top Ad

24 Dec 2017

How to Convert Hex(#C0C0C0) value to UIColor Swift

12/24/2017 10:28:00 pm 0
Hello guys here in this article we are going to learn about converting Hex to UIColor.

First we are creating extension to UIColor as following:

extension UIColor {
 // Code
}

Next add the following two methods inside the color extension as below:

// Create a UIColor from RGB
convenience init(red: Int, green: Int, blue: Int, a: CGFloat = 1.0) {
    self.init(
        red: CGFloat(red) / 255.0,
        green: CGFloat(green) / 255.0,
        blue: CGFloat(blue) / 255.0,
        alpha: a
    )
}

// Create a UIColor from a hex value (E.g 0xC0C0C0)
convenience init(hex: Int, a: CGFloat = 1.0) {
    self.init(
        red: (hex >> 16) & 0xFF,
        green: (hex >> 8) & 0xFF,
        blue: hex & 0xFF,
        a: a
    )
}

We are done for converting Hex to UIColor.

Lets take the following hex value:

Take Silver with hex value as #C0C0C0.

For converting the above hex value add the following line at the start of extension:

static let silver = UIColor(hex: 0xC0C0C0)

That's it now we can use silver color as follow:

let silver  = UIColor.silver


Conclusion:

If you are confused, forget above all lines of code. Simply add the following code :

extension UIColor {
    
    // Create a UIColor from RGB
    convenience init(red: Int, green: Int, blue: Int, a: CGFloat = 1.0) {
        self.init(
            red: CGFloat(red) / 255.0,
            green: CGFloat(green) / 255.0,
            blue: CGFloat(blue) / 255.0,
            alpha: a
        )
    }
    // Create a UIColor from a hex value (E.g 0x000000)
    convenience init(hex: Int, a: CGFloat = 1.0) {
        self.init(
            red: (hex >> 16) & 0xFF,
            green: (hex >> 8) & 0xFF,
            blue: hex & 0xFF,
            a: a
        )
    }
}

That's it we can use now as the follow:

let silver  = UIColor(hex: 0xC0C0C0)


Read More

27 Nov 2017

How to Record and Play Audio in iPhone using swift 4

11/27/2017 10:19:00 am 150
In this article we are going to learn about recording sound using Swift 4. Not only recording but also playing the recorded file.

Here we are using AVAudioRecorder for recording audio and AVAudioPlayer for playing the sound.

It's an easy to record using AVAudioRecorder. We will explain step by step how to record an audio.

For testing this we need a device, because simulator don't has microphone.

How to Record and Play Audio in iPhone using swift 4

Getting Started:

Firstly create a new Xcode project and name it as 'VoiceRecorder' and save.

Before getting into code we need to add Microphone usage description in Info.plist.

Open Info.plist and add 'Privacy - Microphone Usage Description' key, othersiwe app will creash.

Next open ViewController.swift file and import the following AVFoundation framework:

import AVFoundation

Next add the following properties to the view controller:

var recordButton = UIButton()
var playButton = UIButton()
var isRecording = false
var audioRecorder: AVAudioRecorder?
var player : AVAudioPlayer?

Record button is to start or stop the recording, play button is to play the recorded sound, isRecoding is an Bool to know the state, audio Recorder is to handle the actual reading and saving of data and finally player to handle the actual playing or stopping the audio.

Microphone Permission:

Next step is we need to ask the user's permission for accessing the microphone in order to stop malicious apps doing malicious things. If the user grant permission we will add the record and play button UI.

Add the following code inside viewDidLoad() method:

view.backgroundColor = UIColor.black

// Asking user permission for accessing Microphone
AVAudioSession.sharedInstance().requestRecordPermission () {
    [unowned self] allowed in
    if allowed {
        // Microphone allowed, do what you like!
        self.setUpUI()
    } else {
        // User denied microphone. Tell them off!
        
    }
}

Add the following methods for setting up the UI:

// Adding play button and record buuton as subviews
func setUpUI() {
    recordButton.translatesAutoresizingMaskIntoConstraints = false
    playButton.translatesAutoresizingMaskIntoConstraints = false
    view.addSubview(recordButton)
    view.addSubview(playButton)
    
    // Adding constraints to Record button
    recordButton.centerXAnchor.constraint(equalTo: view.centerXAnchor).isActive = true
    recordButton.centerYAnchor.constraint(equalTo: view.centerYAnchor).isActive = true
    let recordButtonHeightConstraint = recordButton.heightAnchor.constraint(equalToConstant: 50)
    recordButtonHeightConstraint.isActive = true
    recordButton.widthAnchor.constraint(equalTo: recordButton.heightAnchor, multiplier: 1.0).isActive = true
    recordButton.setImage(#imageLiteral(resourceName: "record"), for: .normal)
    recordButton.layer.cornerRadius = recordButtonHeightConstraint.constant/2
    recordButton.layer.borderColor = UIColor.white.cgColor
    recordButton.layer.borderWidth = 5.0
    recordButton.imageEdgeInsets = UIEdgeInsetsMake(-20, -20, -20, -20)
    recordButton.addTarget(self, action: #selector(record(sender:)), for: .touchUpInside)
    
    // Adding constraints to Play button
    playButton.heightAnchor.constraint(equalToConstant: 60).isActive = true
    playButton.widthAnchor.constraint(equalTo: playButton.heightAnchor, multiplier: 1.0).isActive = true
    playButton.trailingAnchor.constraint(equalTo: recordButton.leadingAnchor, constant: -16).isActive = true
    playButton.centerYAnchor.constraint(equalTo: recordButton.centerYAnchor).isActive = true
    playButton.setImage(#imageLiteral(resourceName: "play"), for: .normal)
    playButton.addTarget(self, action: #selector(play(sender:)), for: .touchUpInside)
}

@objc func record(sender: UIButton) {

}

@objc func play(sender: UIButton) {
    
}

Here we added button using auto layout constraints programmatically.

Build and Run, next allow the Microphone for recording. Then the screen looks like below:

Play and stop button for recording swift 4

Start recording:

All buttons setting up done, next step is to start recording.

Add the following method to record an audio:

func startRecording() {
    //1. create the session
    let session = AVAudioSession.sharedInstance()
    
    do {
        // 2. configure the session for recording and playback
        try session.setCategory(AVAudioSessionCategoryPlayAndRecord, with: .defaultToSpeaker)
        try session.setActive(true)
        // 3. set up a high-quality recording session
        let settings = [
            AVFormatIDKey: Int(kAudioFormatMPEG4AAC),
            AVSampleRateKey: 44100,
            AVNumberOfChannelsKey: 2,
            AVEncoderAudioQualityKey: AVAudioQuality.high.rawValue
        ]
        // 4. create the audio recording, and assign ourselves as the delegate
        audioRecorder = try AVAudioRecorder(url: getAudioFileUrl(), settings: settings)
        audioRecorder?.delegate = self
        audioRecorder?.record()
        
        //5. Changing record icon to stop icon
        isRecording = true
        recordButton.setImage(#imageLiteral(resourceName: "stop"), for: .normal)
        recordButton.imageEdgeInsets = UIEdgeInsetsMake(5, 5, 5, 5)
        playButton.isEnabled = false
    }
    catch let error {
        // failed to record!
    }
}

Here we created AVAudioSession and creating audio recording. Add the following method for getting the path to save or retrieve the audio.

// Path for saving/retreiving the audio file
func getAudioFileUrl() -> URL{
    let paths = FileManager.default.urls(for: .documentDirectory, in: .userDomainMask)
    let docsDirect = paths[0]
    let audioUrl = docsDirect.appendingPathComponent("recording.m4a")
    return audioUrl
}

Next step is to conform to AVAudioRecorderDelegate protocol as follow:

class ViewController: UIViewController, AVAudioRecorderDelegate {

Next add the following code inside record() method:

Stop Recording:

Add the following method to stop recording an audio.

// Stop recording
func finishRecording() {
    audioRecorder?.stop()
    isRecording = false
    recordButton.imageEdgeInsets = UIEdgeInsetsMake(-20, -20, -20, -20)
    recordButton.setImage(#imageLiteral(resourceName: "record"), for: .normal)
}

Just needs to call either startRecording() or finishRecording() depending on the isRecording state.

Next add the following code inside record() method:

if isRecording {
    finishRecording()
}else {
    startRecording()
}

Before you're done, there's one more thing to be aware of: iOS might stop your recording for some reason out of your control, such as if a phone call comes in. We use the delegate of the audio recorder, so if this situation crops up you'll be sent a audioRecorderDidFinishRecording() message that you can pass on to finishRecording() like this:

func audioRecorderDidFinishRecording(_ recorder: AVAudioRecorder, successfully flag: Bool) {
    if flag {
        finishRecording()
    }else {
        // Recording interrupted by other reasons like call coming, reached time limit.
    }
    playButton.isEnabled = true
}

That's it recording an audio successfully completed.

Play Audio:

For playing sound we are using AVAudioPlayer, so add the following method:

func playSound(){
    let url = getAudioFileUrl()
    
    do {
        // AVAudioPlayer setting up with the saved file URL
        let sound = try AVAudioPlayer(contentsOf: url)
        self.player = sound
        
        // Here conforming to AVAudioPlayerDelegate
        sound.delegate = self
        sound.prepareToPlay()
        sound.play()
        recordButton.isEnabled = false
    } catch {
        print("error loading file")
        // couldn't load file :(
    }
}

Conform to the AVAudioPlayerDelegate protocol as follow:

class ViewController: UIViewController, AVAudioRecorderDelegate, AVAudioPlayerDelegate {

Next call the following method inside play() method as follow:

@objc func play(sender: UIButton) {
    playSound()
}

Add the AVAudioPlayerDelegate delegate method audioPlayerDidFinishPlaying() as follow to know whether audio finished playing or interrupted by an reason.

func audioPlayerDidFinishPlaying(_ player: AVAudioPlayer, successfully flag: Bool) {
    if flag {
        
    }else {
        // Playing interrupted by other reasons like call coming, the sound has not finished playing.
    }
    recordButton.isEnabled = true
}

Great we are done, it's time to run and test.

Download sample project with example :

Read More

20 Nov 2017

How to convert Range to NSRange and Viceversa

11/20/2017 10:25:00 am 2
NSRange contains two properties.

1. location
2. length

How to convert Range to NSRange and Viceversa

For example:

Get the range of word "find" from the following string.

let originalString = "Hello let's find range"

"find" located at position 12, and is length of 4. So range should be as follow:

let range = NSMakeRange(12, 4)

Range:

For getting range we have built in method as follow:

let originalString = "Hello let's find range"
let range = originalString.range(of: "find")

Convert Range to NSRange:

Add the following string extension for converting Range to NSRange:

extension String {
    func nsRange(from range: Range) -> NSRange {
        let startPos = self.distance(from: self.startIndex, to: range.lowerBound)
        let endPos = self.distance(from: self.startIndex, to: range.upperBound)
        return NSMakeRange(startPos, endPos - startPos)
    }
}

Use as follow:

let nsRange = originalString.nsRange(from: range!)

Convert NSRange to Range:

Add the following string extension for converting NSRange to Range:

extension String { 
    func range(from nsRange: NSRange) -> Range? {
        guard
            let from16 = utf16.index(utf16.startIndex, offsetBy: nsRange.location, limitedBy: utf16.endIndex),
            let to16 = utf16.index(utf16.startIndex, offsetBy: nsRange.location + nsRange.length, limitedBy: utf16.endIndex),
            let from = from16.samePosition(in: self),
            let to = to16.samePosition(in: self)
            else { return nil }
        return from ..< to
    }
}

Use as follow:

let newRange = originalString.range(from: nsRange)

Read More

18 Nov 2017

UIRotationGestureRecognizer - Rotate image with Two Fingers in swift

11/18/2017 09:37:00 am 1
In this tutorial we will learn how to rotate an imageView using UIRotationGestureRecognizer.

A rotation gesture is a continuous gesture that occurs when the first two fingers that touch the screen rotate around each other

The iOS UIRotationGestureRecognizer class has a built-in way to detect rotation gesture on any view.

UIRotationGestureRecognizer - Rotate image with Two Fingers in swift

Other Gestures in iOS:

Getting Started:

Firstly create new Xcode project and save it with 'RotationGesture'.

Next open the ViewController.swift file and add the imageView as follow.

Adding ImageView:

First create imageView property as follow:

let imageView = UIImageView()

Next add imageView as sub view and give the auto layout constraints. Add the following code in viewDidLoad() method:

imageView.translatesAutoresizingMaskIntoConstraints = false
imageView.image = UIImage(named: "cat")
imageView.contentMode = .scaleAspectFill
imageView.clipsToBounds = true
view.addSubview(imageView)
imageView.centerXAnchor.constraint(equalTo: view.centerXAnchor).isActive = true
imageView.centerYAnchor.constraint(equalTo: view.centerYAnchor).isActive = true
imageView.widthAnchor.constraint(equalTo: view.widthAnchor, multiplier: 0.6).isActive = true
imageView.heightAnchor.constraint(equalTo: imageView.widthAnchor, multiplier: 1).isActive = true

Adding Rotation Gesture:

First create an instance to UIRotationGestureRecognizer() as follow:

var rotationGesture = UIRotationGestureRecognizer()

Next add rotationGesture to the imageView. Add the following code to the end of viewDidLoad() method:

rotationGesture = UIRotationGestureRecognizer(target: self, action: #selector(self.rotationGestureHandler))
imageView.isUserInteractionEnabled = true
imageView.addGestureRecognizer(rotationGesture)

The isUserInteractionEnabled property of the view is set to true. Image views and labels set this property to false by default.

Finally add the action for the rotate gesture, add the following method:

@objc func rotationGestureHandler(recognizer:UIRotationGestureRecognizer){
    if let view = recognizer.view {
        view.transform = view.transform.rotated(by: recognizer.rotation)
        recognizer.rotation = 0
    }
}

Run the project, we will see an image with an rotate gesture as follow:

UIRotationGestureRecognizer - Rotate image with Two Fingers in swift-gif
Download sample project with example :

Read More

16 Nov 2017

UILongPressGestureRecognizer - Image zoom in and out example on Long Press Gesture in swift

11/16/2017 08:54:00 am 0
In this tutorial we will learn how to zoom in and out an imageView using UILongPressGestureRecognizer.

The iOS UILongPressGestureRecognizer class has a built-in way to detect long press gesture on any view.

UILongPressGestureRecognizer - Image zoom in and out example on Long Press Gesture in swift gif

Other Gestures in iOS:


Getting Started:

Firstly create new Xcode project and save it with 'LongPressGesture'.

Next open the ViewController.swift file and add the imageView as follow.

Adding ImageView:

First create imageView property as follow:

let imageView = UIImageView()

Next add imageView as sub view and give the auto layout constraints. Add the following code in viewDidLoad() method:

imageView.translatesAutoresizingMaskIntoConstraints = false
imageView.image = UIImage(named: "cat")
imageView.contentMode = .scaleAspectFill
imageView.clipsToBounds = true
view.addSubview(imageView)
imageView.centerXAnchor.constraint(equalTo: view.centerXAnchor).isActive = true
imageView.centerYAnchor.constraint(equalTo: view.centerYAnchor).isActive = true
imageView.widthAnchor.constraint(equalTo: view.widthAnchor, multiplier: 0.4).isActive = true
imageView.heightAnchor.constraint(equalTo: imageView.widthAnchor, multiplier: 1).isActive = true

Adding Long Press Gesture:

First create an instance to UILongPressGestureRecognizer() as follow:

var longPressGesture = UILongPressGestureRecognizer()

Next add longPressGesture to the imageView. Add the following code to the end of viewDidLoad() method:

longPressGesture = UILongPressGestureRecognizer(target: self, action: #selector(self.longPressGestureHandler))
imageView.isUserInteractionEnabled = true
imageView.addGestureRecognizer(longPressGesture)

The isUserInteractionEnabled property of the view is set to true. Image views and labels set this property to false by default.

Finally add the action for the long press gesture, add the following method:

@objc func longPressGestureHandler(recognizer:UIPinchGestureRecognizer){
    switch recognizer.state {
    case .began:
        UIView.animate(withDuration: 0.05,
                       animations: {
                        self.imageView.transform = CGAffineTransform(scaleX: 1.5, y: 1.5)
        },
                       completion: nil)
    case .ended:
        UIView.animate(withDuration: 0.05) {
            self.imageView.transform = CGAffineTransform.identity
        }
    default: break
    }
}

Run the project, we will see an image with an long press gesture as follow:

Tap on image and hold for 1 sec we will see image zoom in as follow:

UILongPressGestureRecognizer - Image zoom in and out example on Long Press Gesture in swift

Download sample project with example :

Read More

15 Nov 2017

Download Xcode dmg file for iOS development | Download all versions of Xcode dmg file

11/15/2017 10:18:00 am 0
Read More

UIPanGestureRecognizer - Dragging View Example in Swift

11/15/2017 08:24:00 am 0
In this tutorial we will learn how to drag a view using UIPanGestureRecognizer.

The iOS UIPanGestureRecognizer class has a built-in way to detect pan gesture on any view.

UIPanGestureRecognizer - Dragging View Example in Swift

Other Gestures in iOS:

Single Tap & Double Tap Gesture - UITapGestureRecognizer
Swipe Gesture Recognizer - UISwipeGestureRecognizer
Pinch Gesture Recognizer - UIPinchGestureRecognizer
Long Press Gesture - UILongPressGestureRecognizer
UIRotationGestureRecognizer - Rotate Image View swift

Getting Started:

Firstly create new Xcode project and save it with 'PanGesture'.

Next open the ViewController.swift file and add the imageView as follow.

Adding ImageView:

First create imageView property as follow:

let imageView = UIImageView()

Next add imageView as sub view and give the auto layout constraints. Add the following code in viewDidLoad() method:

imageView.translatesAutoresizingMaskIntoConstraints = false
imageView.image = UIImage(named: "cat")
imageView.contentMode = .scaleAspectFill
imageView.clipsToBounds = true
view.addSubview(imageView)
imageView.centerXAnchor.constraint(equalTo: view.centerXAnchor).isActive = true
imageView.centerYAnchor.constraint(equalTo: view.centerYAnchor).isActive = true
imageView.widthAnchor.constraint(equalTo: view.widthAnchor, multiplier: 0.4).isActive = true
imageView.heightAnchor.constraint(equalTo: imageView.widthAnchor, multiplier: 1).isActive = true

Adding Pan Gesture:

First create an instance to UIPanGestureRecognizer() as follow:

var panGesture  = UIPanGestureRecognizer()

Next add panGesture to the imageView. Add the following code to the end of viewDidLoad() method:

panGesture = UIPanGestureRecognizer(target: self, action: #selector(self.panGestureHandler(_:)))
imageView.isUserInteractionEnabled = true
imageView.addGestureRecognizer(panGesture)

The isUserInteractionEnabled property of the view is set to true. Image views and labels set this property to false by default.

Finally add the action for the pan gesture, add the following method:

@objc func panGestureHandler(_ recognizer: UIPanGestureRecognizer){
    self.view.bringSubview(toFront: imageView)
    let translation = recognizer.translation(in: self.view)
    imageView.center = CGPoint(x: imageView.center.x + translation.x, y: imageView.center.y + translation.y)
    recognizer.setTranslation(CGPoint.zero, in: self.view)
}

Run the project, we will see an image with an pan gesture as follow:

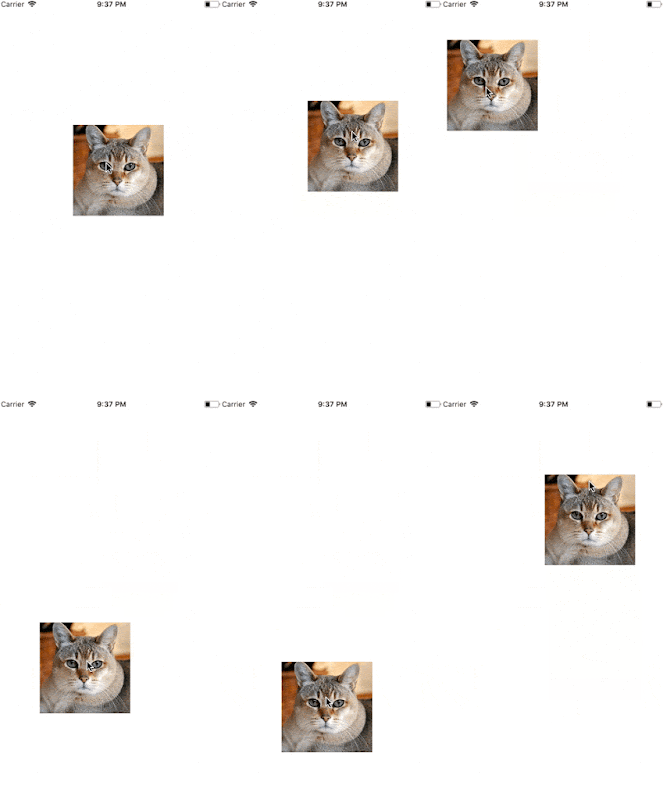
UIPanGestureRecognizer - Dragging View Example in Swift

Download sample project with example :

Read More

14 Nov 2017

Set Up Multiple Colors and Fonts in a Single Label Swift

11/14/2017 10:30:00 am 0
In this article we learn setting up different colors in one label using NSAttributedString.

Label has text property and attributedText property.

Here we are going to use attributedText property for customization.

Set Up Multiple Colors and Fonts in a Single Label Swift
Add the following code:

override func viewDidLoad() {
    super.viewDidLoad()
    let label = UILabel()
    label.translatesAutoresizingMaskIntoConstraints = false
    label.textAlignment = .center
    view.addSubview(label)
    label.centerXAnchor.constraint(equalTo: view.centerXAnchor).isActive = true
    label.centerYAnchor.constraint(equalTo: view.centerYAnchor).isActive = true
    label.widthAnchor.constraint(equalTo: view.widthAnchor, multiplier: 0.98).isActive = true
    label.heightAnchor.constraint(equalTo: label.widthAnchor, multiplier: 1).isActive = true
    
    let normalString = "BLUE  RED  GREEN  PURPLE  YELLOW"
    
    let attributedText = NSMutableAttributedString(string: normalString)
    
    attributedText.addAttributes([NSAttributedStringKey.foregroundColor: UIColor.blue, NSAttributedStringKey.font: UIFont(name: "AvenirNext-Bold", size: 15)!], range: getRangeOfSubString(subString: "BLUE", fromString: normalString)) // Blue color attribute
    
    attributedText.addAttributes([NSAttributedStringKey.foregroundColor: UIColor.red, NSAttributedStringKey.font: UIFont(name: "Baskerville-BoldItalic", size: 27)!], range: getRangeOfSubString(subString: "RED", fromString: normalString)) // RED color attribute
    
    attributedText.addAttributes([NSAttributedStringKey.foregroundColor: UIColor.green, NSAttributedStringKey.font: UIFont(name: "Chalkduster", size: 19)!], range: getRangeOfSubString(subString: "GREEN", fromString: normalString)) // GREEN color attribute
    
    attributedText.addAttributes([NSAttributedStringKey.foregroundColor: UIColor.purple, NSAttributedStringKey.font: UIFont(name: "DINCondensed-Bold", size: 13)!], range: getRangeOfSubString(subString: "PURPLE", fromString: normalString)) // PURPLE color attribute
    
    attributedText.addAttributes([NSAttributedStringKey.foregroundColor: UIColor.yellow, NSAttributedStringKey.font: UIFont(name: "Futura-CondensedExtraBold", size: 24)!], range: getRangeOfSubString(subString: "YELLOW", fromString: normalString)) // YELLOW color attribute
    
    label.attributedText = attributedText
}

func getRangeOfSubString(subString: String, fromString: String) -> NSRange {
    let sampleLinkRange = fromString.range(of: subString)!
    let startPos = fromString.distance(from: fromString.startIndex, to: sampleLinkRange.lowerBound)
    let endPos = fromString.distance(from: fromString.startIndex, to: sampleLinkRange.upperBound)
    let linkRange = NSMakeRange(startPos, endPos - startPos)
    return linkRange
}

In above code we are setting attribute color and font attributes for each word using NSRange.

Download sample project with example :

Read More

13 Nov 2017

Limit characters in TextField or TextView Swift

11/13/2017 08:33:00 am 0
In this article we will learn how to set maximum character length to a UITextField and UITextView.

We go through each one separately.

UITextField:

First add UITextField to the view and conform to UITextFieldDelegate.

Next add the following delegate method for setting up the maximum limit:

func textField(_ textField: UITextField, shouldChangeCharactersIn range: NSRange, replacementString string: String) -> Bool {
    let currentText = textField.text ?? ""
    guard let stringRange = Range(range, in: currentText) else { return false }
    let updatedText = currentText.replacingCharacters(in: stringRange, with: string)
    return updatedText.count <= 10 // Change limit based on your requirement.
} 

Above example is for, if user asked to enter his/her mobile number, assume maximum length as 10.

Download the sample project from the bottom of this article.

UITextView:

Add UITextView to the view and conform to UITextViewDelegate.

Next add the following delegate method for setting the maximum limit:

func textView(_ textView: UITextView, shouldChangeTextIn range: NSRange, replacementText text: String) -> Bool {
    let currentText = textView.text ?? ""
    guard let stringRange = Range(range, in: currentText) else { return false }
    let updatedText = currentText.replacingCharacters(in: stringRange, with: text)
    return updatedText.count <= 50 // Change limit based on your requirement.
}

Above example is for, if user asked to enter about his/her, assume maximum limit here 50 characters.

Download sample project with example :

Read More

12 Nov 2017

UIPinchGestureRecognizer - Pinch Gesture Example on ImageView in Swift 4

11/12/2017 10:01:00 am 0
The iOS UIPinchGestureRecognizer class has a built-in way to detect pinch gesture on any view.

In this tutorial we will learn Pinch Gesture Recognizer on ImageView.

UIPinchGestureRecognizer - Pinch Gesture Example on ImageView in Swift 4

Other Gestures in iOS:

Single Tap & Double Tap Gesture - UITapGestureRecognizer
Swipe Gesture Recognizer - UISwipeGestureRecognizer
Pan Gesture Recognizer - UIPanGestureRecognizer
Long Press Gesture - UILongPressGestureRecognizer
UIRotationGestureRecognizer - Rotate Image View swift 

Getting Started:

Firstly create new Xcode project and save it with 'PinchGesture'.

Next open the ViewController.swift file and add the imageView as follow.

Adding ImageView:

First create imageView property as follow:

let imageView = UIImageView()

Next add imageView as sub view and give the auto layout constraints. Add the following code in viewDidLoad() method:

imageView.translatesAutoresizingMaskIntoConstraints = false
imageView.image = UIImage(named: "cat")
imageView.contentMode = .scaleAspectFill
imageView.clipsToBounds = true
view.addSubview(imageView)
imageView.centerXAnchor.constraint(equalTo: view.centerXAnchor).isActive = true
imageView.centerYAnchor.constraint(equalTo: view.centerYAnchor).isActive = true
imageView.widthAnchor.constraint(equalTo: view.widthAnchor, multiplier: 0.6).isActive = true
imageView.heightAnchor.constraint(equalTo: imageView.widthAnchor, multiplier: 1).isActive = true

Adding Pinch Gesture:

First create an instance to UIPinchGestureRecognizer() as follow:

var pinchGesture  = UIPinchGestureRecognizer()

Next add pinchGesture to the imageView. Add the following code to the end of viewDidLoad() method:

pinchGesture = UIPinchGestureRecognizer(target: self, action: #selector(self.pincheGestureHandler))
imageView.isUserInteractionEnabled = true
imageView.addGestureRecognizer(pinchGesture)

The isUserInteractionEnabled property of the view is set to true. Image views and labels set this property to false by default.

Finally add the action for the pinch gesture, add the following method:

@objc func pincheGestureHandler(recognizer:UIPinchGestureRecognizer){
    self.view.bringSubview(toFront: imageView)
    recognizer.view?.transform = (recognizer.view?.transform)!.scaledBy(x: recognizer.scale, y: recognizer.scale)
    recognizer.scale = 1.0
}

Run the project, we will see an image with an pinch gesture as follow:

UIPinchGestureRecognizer - Pinch Gesture Example on ImageView in Swift 4 gif

Download sample project with example :

Read More

11 Nov 2017

UITapGestureRecognizer - Single Tap & Double Tap Example in Swift 4

11/11/2017 12:41:00 am 0
The iOS UITapGestureRecognizer class has a built-in way to detect taps on any view. We can set the required taps based on our usage.

UITapGestureRecognizer - Single Tap & Double Tap Example in Swift 4

Other Gestures in iOS:

Swipe Gesture Recognizer - UISwipeGestureRecognizer
Pinch Gesture Recognizer - UIPinchGestureRecognizer

Pan Gesture Recognizer - UIPanGestureRecognizer
Long Press Gesture - UILongPressGestureRecognizer
UIRotationGestureRecognizer - Rotate Image View swift

Single Tap Gesture:

For detecting single tap gesture, here's an example:

override func viewDidLoad() {
    super.viewDidLoad()
    
    let tapGesture = UITapGestureRecognizer(target: self, action: #selector(singleTap(gesture:)))
    view.addGestureRecognizer(tapGesture)
}

@objc func singleTap(gesture: UITapGestureRecognizer) {
    print("single tap called")
}


Double Tap Gesture:

For detecting Double tap gesture is similar to above, just we need to set numberOfTapsRequired to 2.

Here's an example:

override func viewDidLoad() {
    super.viewDidLoad()
    
    let tapGesture = UITapGestureRecognizer(target: self, action: #selector(doubleTap(gesture:)))
    tapGesture.numberOfTapsRequired = 2
    view.addGestureRecognizer(tapGesture)
}

@objc func doubleTap(gesture: UITapGestureRecognizer) {
    print("double tap called")
}

Read More

10 Nov 2017

Add Search Bar in Navigation Bar swift | Customize Search Bar

11/10/2017 03:35:00 am 5
In this article we will learn how to add search controller in navigation bar. Customizing search bar like placeholder text, title text, clear button.

Here we are going to use Large Title Navigation bar.

Adding Search Bar In Navigation Bar:

Add the following code in viewDidLoad() method for adding search bar:

if #available(iOS 11.0, *) {
    navigationController?.navigationBar.prefersLargeTitles = true // Navigation bar large titles
    navigationItem.title = "Contacts"
    navigationController?.navigationBar.largeTitleTextAttributes = [NSAttributedStringKey.foregroundColor : UIColor.white]
    navigationController?.navigationBar.barTintColor = UIColor(displayP3Red: 0/255, green: 150/255, blue: 136/255, alpha: 1.0)
    
    let searchController = UISearchController(searchResultsController: nil) // Search Controller
    navigationItem.hidesSearchBarWhenScrolling = false
    navigationItem.searchController = searchController
}

Adding Search Bar In Navigation Bar:

Customizing Search Bar:

Change Search Bar Placeholder text & color:

Add the following line of code to change placeholder text and color:

UITextField.appearance(whenContainedInInstancesOf: [UISearchBar.self]).attributedPlaceholder = NSAttributedString(string: "Search contacts", attributes: [NSAttributedStringKey.foregroundColor: UIColor.orange])


Change search bar text color:

Add the following line for chaning the text color of search bar:

UITextField.appearance(whenContainedInInstancesOf: [UISearchBar.self]).defaultTextAttributes = [NSAttributedStringKey.foregroundColor.rawValue: UIColor.white]


Change cancel button title & color:

For changing cancel button text & color add the following code:

searchController.searchBar.tintColor = UIColor.white
UIBarButtonItem.appearance(whenContainedInInstancesOf: [UISearchBar.self]).title = "Dismiss"


Change clear icon:

Add the following code for changing the clear icon:

searchController.searchBar.setImage(UIImage(named: "delete_icon"), for: UISearchBarIcon.clear, state: .normal)


Change search icon:

Add the following code for changing the search icon:

searchController.searchBar.setImage(UIImage(named: "search_icon"), for: UISearchBarIcon.search, state: .normal)


Change Search Bar background color:

For changing the background color add the following code:

if let textfield = searchController.searchBar.value(forKey: "searchField") as? UITextField {
    if let backgroundview = textfield.subviews.first {
        backgroundview.backgroundColor = UIColor.white
        backgroundview.layer.cornerRadius = 10
        backgroundview.clipsToBounds = true
    }
}


Read More

9 Nov 2017

Swipe Gesture Recognizer On ImageView swift 4

11/09/2017 04:55:00 am 0
Swipe Gesture Recognizer is the one of the important gesture for the iOS users. It's really easy to implement, here we will show implementation to swipe gesture with an example project.

In this example project we are going to swipe image to left, right, up and down.

Swipe Gesture Recognizer On ImageView swift 4

Other Gestures in iOS:

Single Tap & Double Tap Gesture - UITapGestureRecognizer
Pinch Gesture Recognizer - UIPinchGestureRecognizer
Pan Gesture Recognizer - UIPanGestureRecognizer
Long Press Gesture - UILongPressGestureRecognizer
UIRotationGestureRecognizer - Rotate Image View swift 

Getting Started:

Firstly create new Xcode project and save it with 'SwipeGesture'.

Next open the ViewController.swift file and add the imageView as follow.

Adding ImageView:

First create imageView property as follow:

let imageView = UIImageView()

Next add imageView as sub view and give the auto layout constraints. Add the following code in viewDidLoad() method:

imageView.translatesAutoresizingMaskIntoConstraints = false
imageView.image = UIImage(named: "cat")
imageView.contentMode = .scaleAspectFill
imageView.clipsToBounds = true
view.addSubview(imageView)
imageView.centerXAnchor.constraint(equalTo: view.centerXAnchor).isActive = true
imageView.centerYAnchor.constraint(equalTo: view.centerYAnchor).isActive = true
imageView.widthAnchor.constraint(equalTo: view.widthAnchor, multiplier: 0.6).isActive = true
imageView.heightAnchor.constraint(equalTo: imageView.widthAnchor, multiplier: 1).isActive = true

Adding Swipe Gesture:

First create an instance to UISwipeGestureRecognizer() as follow:

var swipeGesture  = UISwipeGestureRecognizer()

Next add swipeGesture to the imageView. Add the following code to the end of viewDidLoad() method:

let directions: [UISwipeGestureRecognizerDirection] = [.up, .down, .right, .left]

for direction in directions {
    swipeGesture = UISwipeGestureRecognizer(target: self, action: #selector(self.swipwView(_:)))
    imageView.addGestureRecognizer(swipeGesture)
    swipeGesture.direction = direction
    imageView.isUserInteractionEnabled = true
    imageView.isMultipleTouchEnabled = true
}

The isUserInteractionEnabled property of the view is set to true. Image views and labels set this property to false by default.

Finally add the action for the swipe gesture in all directions:

@objc func swipwView(_ sender : UISwipeGestureRecognizer){
    UIView.animate(withDuration: 1.0) {
        if sender.direction == .right { // Swipe right action
            
            self.imageView.frame = CGRect(x: self.view.frame.size.width - self.imageView.frame.size.width, y: self.imageView.frame.origin.y , width: self.imageView.frame.size.width, height: self.imageView.frame.size.height)
        }else if sender.direction == .left{ // Swipe left action
            
            self.imageView.frame = CGRect(x: 0, y: self.imageView.frame.origin.y , width: self.imageView.frame.size.width, height: self.imageView.frame.size.height)
            
        }else if sender.direction == .up{ // Swipe up action
            
            self.imageView.frame = CGRect(x: self.view.frame.size.width - self.imageView.frame.size.width, y: 0 , width: self.imageView.frame.size.width, height: self.imageView.frame.size.height)
        }else if sender.direction == .down{ // Swipe down action
            
            self.imageView.frame = CGRect(x: self.view.frame.size.width - self.imageView.frame.size.width, y: self.view.frame.size.height - self.imageView.frame.height , width: self.imageView.frame.size.width, height: self.imageView.frame.size.height)
        }
        self.imageView.layoutIfNeeded()
        self.imageView.setNeedsDisplay()
    }
}

Run the project, we will see an image. swipe and test it works as follow:

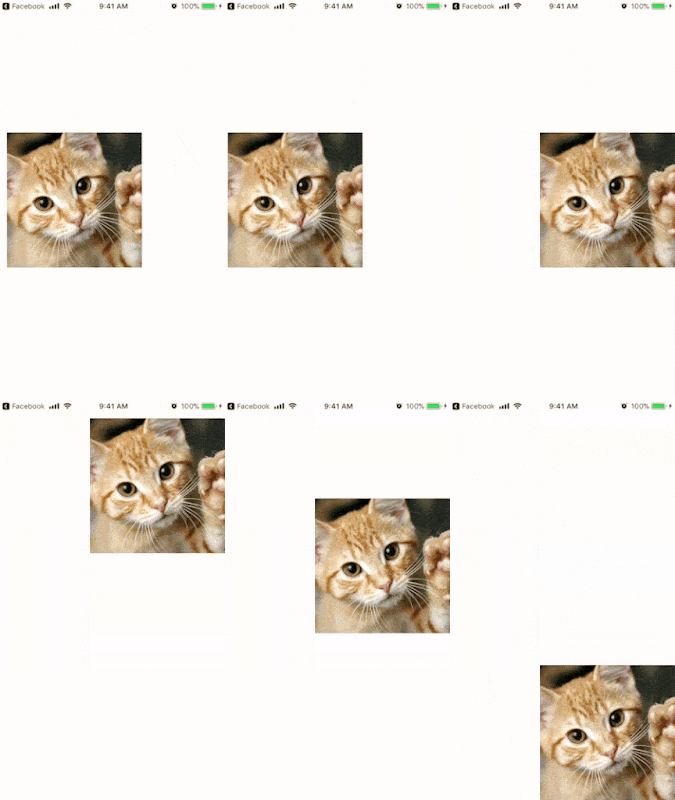
swift 4 swipe gesture recognizer example,Swipe back and forth through array of images Swift 4,UISwipeGestureRecognizer,How to recognize swipe in all 4 directions swift 4,Handling Swipe Gestures,Detecting Swipe Gestures in iOS 11 with Swift 4,swift 3 swipe gesture recognizer.
Download sample project with example :

Read More

8 Nov 2017

UILabel Left and Right margin Padding with Round Corners in Swift 4

11/08/2017 09:30:00 am 0
In this article we will learn how to add margins/padding to the label using custom UIEdgeInsets.

UILabel Left and Right margin Padding with Round Corners in Swift 4

In the above image we can clearly see "without padding" and "with padding".

"Without padding" is not looking great, so usually developers prefer labels with padding.


Step 1:

Create new swift file and add the following code:

import UIKit

class SSPaddingLabel: UILabel {
    var padding : UIEdgeInsets
    
    
    // Create a new SSPaddingLabel instance programamtically with the desired insets
    required init(padding: UIEdgeInsets = UIEdgeInsets(top: 0, left: 10, bottom: 0, right: 10)) {
        self.padding = padding
        super.init(frame: CGRect.zero)
    }
    
    // Create a new SSPaddingLabel instance programamtically with default insets
    override init(frame: CGRect) {
        padding = UIEdgeInsets.zero // set desired insets value according to your needs
        super.init(frame: frame)
    }
    
    // Create a new SSPaddingLabel instance from Storyboard with default insets
    required init?(coder aDecoder: NSCoder) {
        padding = UIEdgeInsets.zero // set desired insets value according to your needs
        super.init(coder: aDecoder)
    }
    
    override func drawText(in rect: CGRect) {
        super.drawText(in: UIEdgeInsetsInsetRect(rect, padding))
    }
    
    // Override `intrinsicContentSize` property for Auto layout code
    override var intrinsicContentSize: CGSize {
        let superContentSize = super.intrinsicContentSize
        let width = superContentSize.width + padding.left + padding.right
        let heigth = superContentSize.height + padding.top + padding.bottom
        return CGSize(width: width, height: heigth)
    }
    
    // Override `sizeThatFits(_:)` method for Springs & Struts code
    override func sizeThatFits(_ size: CGSize) -> CGSize {
        let superSizeThatFits = super.sizeThatFits(size)
        let width = superSizeThatFits.width + padding.left + padding.right
        let heigth = superSizeThatFits.height + padding.top + padding.bottom
        return CGSize(width: width, height: heigth)
    }
}


Step 2:

Create label and set content insets as follow:

let label = SSPaddingLabel()
label.translatesAutoresizingMaskIntoConstraints = false
view.addSubview(label)
label.centerXAnchor.constraint(equalTo: view.centerXAnchor).isActive = true
label.centerYAnchor.constraint(equalTo: view.centerYAnchor).isActive = true
label.backgroundColor = UIColor.white
label.padding = UIEdgeInsetsMake(8, 15, 8, 15)
label.text = "Hello Padding!"
label.sizeToFit()
label.layer.cornerRadius = label.frame.height/2
label.layer.masksToBounds = true

Download sample project with example :
Read More

Post Top Ad